Sometimes you may have a need to embed a PDF file within the Excel workbook. This could be the case when you are creating a catalog and want to embed product specific PDFs.
In this tutorial, you’ll learn how to insert a PDF file in an Excel Worksheet.
This Tutorial Covers:
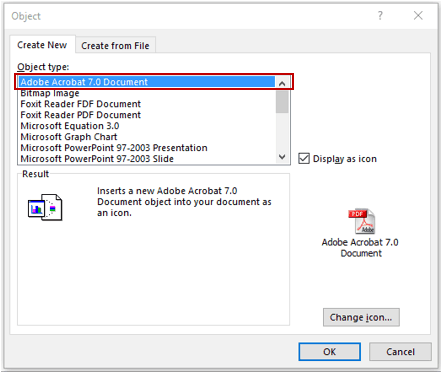
Here are the steps to embed a PDF File in Excel:

These steps would insert a PDF file in the worksheet.
As soon as the PDF is inserted in the worksheet, it also gets opened by default. You can close the PDF file and continue to work with Excel.
The PDF icon inserted using the above steps is an object (just like charts or shapes) and you can resize it and place it anywhere in the worksheet.

To insert multiple PDFs, follow the same steps (as shown above).
When you embed a PDF file in Excel, it is inserted as an object that sits above the worksheet cells. The position of the icon would not change if you change the cells below it.
For example, when you place the icon within a cell, it would not move with the cells and would not get filtered, sorted, or hidden with the cells.
As shown below, if you hide the cell that has the PDF file, it doesn’t hide the PDF.
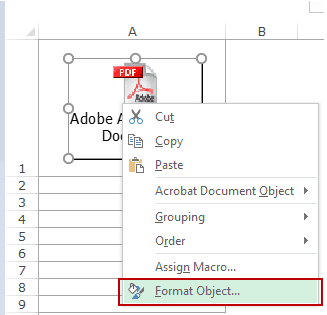
To make sure it sticks to the cell:


Now when you filter or sort/filter the cells, or hide the rows, the PDF object will do the same.
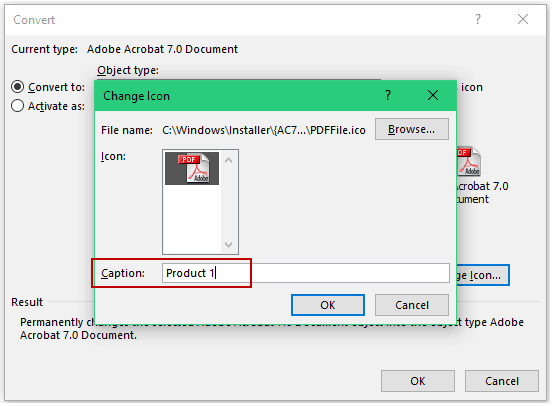
When you embed a PDF file in Excel, it gets a generic name such as “Adobe Acrobat Document”.
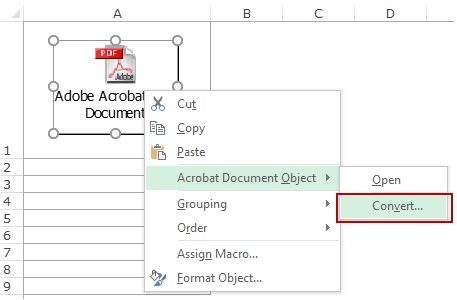
You can change this name by following the below steps:


This will change the name of the embedded PDF file.
Want to convert PDF files to Excel? Check out my tutorial where I show the exact steps to convert PDF files to Excel.
You May Also Like the Following Excel Tutorials: